Showing posts with label home_improvement. Show all posts

Sunday, December 12, 2010

Prayer Walk

We're less than 12 hours from the new carpet coming to New House and the over-the-carpet-painting-areas are all done (huge relief!!!).  So tonight I combined the prayer walk idea from Brazil with the draw on the floor idea my mom let us do back when their house was under construction.

We went around to the carpeted rooms with the boys and our Bible, read verses that were related to the activities we anticipate for the rooms, wrote the scripture reference on the floor, and then prayed over the room.

In the pantry area we read:
Taste and see that the Lord is good. Blessed is the man who goes to him for safety.
and talked about how blessed we are for the food God gives us.

In my office we read:
Sometimes God gives a man wealth and possessions. He makes it possible for him to enjoy them. He helps him accept the life he has given him. He helps him to be happy in his work. All of those things are gifts from God.
and prayed for my work, my clients, and thanking God that I have a job I enjoy doing.

In the living room we read:
Don't forget to welcome strangers. By doing that, some people have welcomed angels without knowing it.
and talked about how we look forward to having Qgroups, friends, family, neighbors, and more over to our new home.

In the master bed we read:
Here is what Israel should say, suppose the Lord had not been on our side. Suppose the Lord had not been on our side when our enemies attacked us. Suppose he had not been on our side when their anger blazed out against us. Then they would have swallowed us alive. They would have been like a flood that drowned us. They would have swept over us like a rushing river. They would have washed us away like a swollen stream. Give praise to the Lord. He has not let our enemies chew us up. We have escaped like a bird from a hunter's trap. The trap has been broken, and we have escaped. Our help comes from the Lord. He is the Maker of heaven and earth.

which has been a deeply personal selection for our marriage and prayed that like Old House, this place can be a sanctuary and a strengthening place for our relationship.

In the boys room we read:
The integrity of the upright guides them

and talked about integrity and prayed our prayer over the boys- that they would will grow to be men of integrity who know and honor God's word.

In the middle bedroom we read:
Religion that God our Father accepts as pure and faultless is this: to look after orphans and widows in their distress and to keep oneself from being polluted by the world.

and talked about the foster babies we look forward to having in our family and prayed for them and for us as we minister to them.

And in the hallway- we read:
He will be the firm foundation for their entire lives. He will give them all of the wisdom, knowledge and saving power they will ever need. Respect for the Lord is the key to that treasure

and talked about how just like this concrete is the foundation for our house, God is our foundation for our lives and then we signed and dated the concrete.

The cutest part in signing our names as that I went first and wrote "Mommy" and then my real name under it.  Geo went next and wrote his name in quotes as well "Geo" and then tried to write a description below- he was trying for brother I'm sure but ended up writing bother of ISH.  Priceless for sure.

Tuesday, December 7, 2010

Tunnel Vision

We got a contract on Old House just after Thanksgiving (nice reason for giving thanks) and we're working to close in December 23 (merry Christmas to me!!)

This means New House needs to be ready asap.

I'm coming to terms that it won't all be done by closing date, but trying to knock out what I can- and it's much better to have not everything done and a sold Old House than all projects complete and two houses.

But carpet comes in Monday which means I feel like I'm living in a tunnel vision- project minded state. ... Wait I think that's not just a feeling. 

Sorry if I seem a bit MIA for a while.

Saturday, November 27, 2010

I think Jason Mraz is stalking me

Or maybe it's just the 14 hour painting spree I've just come off of. (It's very possible that this blog post will go unfinished because my hands will leave in protest of still being used now that I'm back at Old House).

Why might I think he stalking me? Because no matter what Pandora station I listened to today he kept showing up- Hip Hop (yes, I listen to Hip Hop), The Killers station, Folk- doesn't seem to matter he is always there. So clearly he is either the common denominator of all music genres or ... a Pandora restraining order against him might be necessary.

Other thoughts that I have from spending 14 hours with my Pandora account and paint

1. After prolonged exposure to Counting Crows from various live recordings, I think it is quiet possible that Adam Duritz may one day start lowly committing suicide on stage mid-concert and no one will really be shocked given the tone of his live concerts.

2. Does anyone think Justin Timberlake sounds Michael Jackson-esque in Rock Your Body?  Maybe that was what he was going for but close your eyes and think about it.

3. I plugged in Human to Pandora (Because I hadn't heard it awhile and so I put it on, that's why) and everything that came back sounded like it belonged on some sort of movie sound track or at least a Scrubs episode.

And now I'm off to talk LK into massaging my right thumb a bit more.  If by chance this post makes no sense to you, let's blame it paint.

Thursday, October 21, 2010

Master Bedroom Redo

So after a little time for globetrotting, I'm back with before and after pics of the Shady Tree house- this post is all about Master Bedroom.  Here's what it looked like when we bought the house.


I'm sure this style was perfect for them- but for me, this isn't my style.  

So my style then... well my style got the idea that purple would be a fun color for the master bedroom and could be done in a completely masculine way.  So when LK went to San Fran for the week, I scrapped the ceiling and then sat on my floor and cried because the owners who thought the above picture was a good idea also thought that painting the ceiling with oil based paint  was also a good idea and I was left with this:

Looks like something out of a horror movie.  But it wasn't nearly as scary as this:
 

AHHHHHHHHH - it's just wood floors and wall mounted bar away from full on 8-year-old-girl-ballet-class!  Purple had done me wrong!

But have no fear- a few hours minutes in the paint section at Lowes and I had a plan. A mix of silver, pewter, and opalessence glaze and we were back on track.

Well... we were... until the great oil spill a mere few hours before LK's plane landed.

But it was nothing a pair of scissors and a shaggy rug from Target (and eventually new carpet) couldn't fix.

So here we are- the final product.


So to recap- before

And after

Happy decorating

Sunday, September 26, 2010

How to Stain Concrete Floors

No, you have not tuned into HGTV even though all these decorating/remodel pictures and posts might lead you to believe so.  However, I have had a few people ask me about how I stained the floors in the boys' room, hallway, and guest room/office so I thought a FAQ/how to post would be a good place to send them.

Here's my disclaimer on this.  It's been a year since I did the last floors and to me the project is like childbirth.  If you had asked me moments after finishing the project if I would be willing to do it again you would get a very different response from today.  My mind needs time to forget what happened in order to sign me up for it again.  But, like childbirth, after all that work, I have something lovely at the end.

I wasn't blogging when I did the floors but I'll try to recap as much as I can and please feel free to ask any questions.

I didn't go with all out acid stain on the floors, though I've known some who have done it within an already established home.  But for me, most of the videos and tutorials I could find were in open warehouses or not-yet-complete homes.  And then I read somewhere about how the acid can damage walls if it gets on the drywall and how you have to get the base on the acid at just the right time or it can damage the floors.  I have no idea if that's true or not, but it was enough to send me looking for other resources.

Back in the day my mom painted some concrete floors to look like rocks and they looked awesome.  I have no idea the product she used but the product I went with was the tintable Behr Semi-Translucent Concrete Stain.  But before I could get there, I had to remove the old carpet.

If your carpet is like mine was, a starting point for pulling up the carpet was to just grab one of the wrinkled spots, stab it with scissors, cut a starting point and pull.  It helps to have a friend carry the old carpet out because that stuff can get heavy.  Remove the pad underneath it as well.

Once you have that removed, you'll need to take up the carpet tack strips that held the old carpet in place.  I found that the easiest way to do this is to get a hammer and a flathead screwdriver (and a good pair of earplugs and workgloves- those tacks can HURT!).  Wedge the flathead screwdriver under the tack strip near one of the nails holding the tack strip to the floor and hit the handle of the screwdriver to wedge it in further under the strip.  This should create pressure and cause the nail to pop out of the floor.  Sometimes this will only break the strip and leave the nail in place.  If that happens just get some needlenose pliers and wiggle the nail out.  Doing this will likely take off some of the concrete around the area where the nail was.  There are products out there to patch the concrete but depending on the look you're going for, leaving small blemishes like that could be okay.  I left the blemishes.  (By the way, that's not a picture of my arm- I found it online- least you all start trying to get me in for a good beautification day.  I may be into manual labor but I'm not into looking like a man)

Once that's all removed and you step back to see the space you'll be transforming, you very well may break down and cry (have kleenex on hand), questioning why on earth you thought this project was a good idea.  Because if your home builder is like mine was back in 1985- he never thought for one moment that anyone would ever see under the carpet, which is why he felt he could leave drywall and paint and a general mess under the carpet.  However, you have decided to pull up the carpet and create something fun and unique but you'll have to now clean up his mess first.

In the boys room I thought I needed to have every piece of this man's mess off the floor before I could proceed (this would he very true if you were using acid stain).  So I used paint stripper, steel wool, flat hand scrapers, and wire brushes and worked for hours on the floor.  (HINT: When using stripper on the floor, do not sit in the stripper, it will eat through your pants and burn your tushie-- I'm just sayin').  But once I saw how well the technique I used covered the floor, I realized it's okay to have some paint down there- the main thing is to get the drywall junk off and make sure the floors are clean.  So the next time I did this, I bought some medium steal wool and used Dawn detergent and water to clean the floors.  This is way less toxic than the stripper but still gets the floors clean.  Have plenty of cleaning rags on hand to wipe up the pieces of steel wool off the floor.  I don't have pics so I'll try and describe the process:

  1. Dip steel wool in bucket of very warm (almost hot) soapy water
  2. Scrub wet steel wool on the floor in a circular motion trying to get all the loose dirt and drywall off the floor
  3. Use cleaning rag to wipe the floor towards you.
  4. Work in sections until the whole floor is clean.
A few tips on this- don't clean the steel wool out in the sink and don't dump the cleaning water in a nice white bathtub or you'll be cleaning rust off the bathtub and sink.  And use disposable cleaning rags.  Normally I'm all for reduce- reuse- recycle but if you put rags with steel wool in the washer- you'll be cleaning rust out of it too.


After you've cleaned the floors (I think I did it twice to make sure all the stuff was up that was going to get up) you need to prime the floors.  I'm not going to say you have to do this step, but it does say it promotes adhesion and really, you don't want to have to come back and touch up.

For this step, the base color and the sealer I used Sur-Line's 7" flat paint pad.  This helps the process truck right along and was a great way to make sure I didn't end up with brush stroke or bristles stuck to the floor.

And even though I'm not the most patient person in the world, I have to agree that the drying/ recoating times they list on the cans are very important to follow.  What you're going for is a good look that is stuck to the floor and not a look that picks up and comes with you each time you take a step.


Once the primer had time to dry I used the flat paint pad to put down the base color, baked clay, which is one of the standard colors offered by Behr in the Semi-Transparent Concrete Stain.

And with all these csteps remember to paint your way out of the room, you don't want to have to walk across the wet paint you just put down.

Here's a pic from me when I was working on the boys room

Again, be sure to let the base color get good and dry.

Once the base color has dried the real fun starts.  For the next step I used spray misters from Walgreens that have multiple sprayer settings (this helps every drop not look the same) and filled one with the base color, one with a darker color (I used Behr Chicory), and for the third one I used regular black acrylic paint (like the Plaid kind you can buy at Hobby Lobby) that I watered down until it was liquidy enough to spray through the spray mister.  It's best to have a place you can test the nozzle settings and the black (which you don't want to have too watery) before you take it into the room to spray.

When you have the spray settings as you want them- take them into the room and spray away.  It's really best to have everything out of the room that matters to you and to wait and change the light fixtures, paint the ceiling, paint the walls, paint the woodwork (you get the idea) after you have finished the floors because in order to not have the same direction with each spray you want to ... well... go a little crazy with the spraying and if you're worried about ruining something in the room you won't have the same artistic freedom you would otherwise.


I let one coat dry and then came back and sprayed the room again.  This helps give a multi-level dimension to the room.  If you're not going for that look- than one coat might do it for you.


Once the floors look how you like them it's time to seal them.  As with the primer, I'm not going to tell you have to do this, but you've already put a lot of work into the floors by now and you don't want to see the work wear off quickly- so take the time and seal it.  There are some high gloss sealers if you're looking for something shiny, but I didn't want gloss, so I used the low luster concrete sealer from Behr and applied it with the flat paint pad.

Since I work and have kids I had to work on this project as I could but I was able to do a 12 x 12 room within a week from pulling up the carpet to putting down the sealer.  If you have some straight hours you can devote to it, it could certainly be done faster.  And while I don't have the receipts to prove it, I do remember talking with LK about the first 12 x 12 room I did being the "100.00 experiment."  So I'm going to guess that the whole thing cost between 100.00 to 150.00 depending on if you have some steel wool, disposable cleaning rags, and black paint on hand or not.


A few more hints:

  1. Without question DO NOT even step a toe on the finished concrete before 72 hours has passed.  If you do this will cause the paint and the concrete not to bond and it will pick up under foot.  It might not the first time, but trust me- it will.  So wait.
  2. Do all connecting rooms at the same time if possible.  If you don't or doing so is just impossible (i.e. would leave you climbing out a window when you're done painting), you can blend the new and old space together but it's really not as easy as doing it all at the same time.
  3. You can't, unfortunately, let the stain sit too long in the sprayer or it will clog the sprayer- but they're also only about 4.00 each so it's not too painful to buy another one if the first clogs (which can still happen sometimes no matter how well you clean the sprayer).
Here's my finished product.  Do you have picture of your finished project?  If so, post a link. I'd love to see it.


Happy decorating,

Saturday, September 25, 2010

The Guest Room/Office

I've being held captive by my sinuses at the moment but they're allowing me enough freedom (for now) to post up some before and after pictures of the guest room/office.

This is where I office (when I'm not officing from the couch or the kitchen table) so I wanted it to be all-me.  I mean, I can't go overboard on the "me-ness" in the shared spaces of the house- though LK has been kind enough to indulge me and my purple master bedroom idea (pictures to come).  But this was done before the battle of the purple, so my excuse to LK was that I needed a girly place.

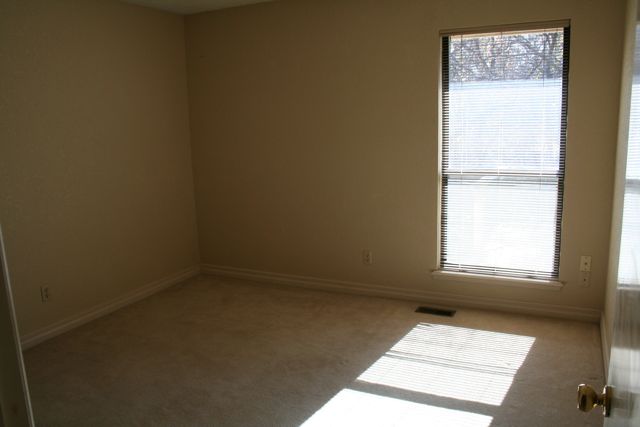
Here are the befores, sans any furniture

Thankfully, I had some good furniture to work with already- my formerly green daybed that I had already spray painted black back in our Midwest City days, my dad's desk that he would use when paying bills at home (I had to beg my mom for it), and an uber discounted mirror I had bought for 80.00 on a splurge when we lived in Memphis.  I wasn't too keen on the peachy color anymore, but I liked the detail.

After painting the walls, I knew I wanted a mural of some kind behind the bed but when I painted what I thought I wanted, it just looked flat.  So to Home Depot I went, wondering the aisles until I found something that would work ... in the roofing section.

Now, not being a roofer myself, I have no idea what theses lovely circles are suppose to be used for, but armed with powergrab they were able to quickly become a focal point in the room.

I should likely call this room "ode to Home Depot" because when I found this radiator grate there as well, I knew it had to be used somewhere.  So I used left over wall paint from the accent wall and painted a canvas from Hobby Lobby that was the same size as the grate.  Then I hot glued screws to the grate (because I had them on hand and needed something to lift the grate off the canvas to give it the look I wanted) and then hot glued the screws to the canvas.

I used the same concrete treatment in here as I did in the boys' room and the hallway and paired it with an amazing rug from Lowes.  Here's the after pics


(notice the now silver mirror on the wall- looks pretty nice and modern now)

And when guests come to stay, I hope they feel they're staying in some posh hotel (that can only offer two twin beds-- queen bed to be purchased for the next house)


So before....

After ...

Before ...

After ...


Happy decorating,

Tuesday, September 21, 2010

The Boys' Room

Continuing the tour of Shady Tree Lane, here's the before pictures of the boys room


It's a good-sized 12 x 12 room that they love sharing, but when we moved in, as you can see, there wasn't a lot of personality in the space.

Look! I did take a few pics of how I did the floor.  So the first step is to pull up all the carpet and the pad and remove the tack strip.  Then you need to clean the floor- now when I was doing the boys room I thought I needed to remove every stinkin' piece of paint and 1985 contractor goodness from the floor- which if I was doing a real concrete acid stain I would have needed to.  But I found Behr semi-translucent concrete stain and for that (and the method I used) you just need it clean (aka- I waisted lost of time and brain cells trying to strip the floor).


For the base color I used baked clay and applied it with a flat paint pad - and remember to paint your self out of the room and not into a corner :)


Then I put the baked clay, a red stain (I can't remember the color), and regular black acrylic artist paint that I waters down a bit into regular garden spray bottles and used my three "guns" to fire away at the floor.  One key I discovered is to shoot from various angles or you'll be able to tell from the drop patterns where the "shooter" was standing when it's done (I felt so CSI!).  Another key is to do the floors FIRST and then paint the wall because this "shooting" style is EXTREMELY messy.

Here's the final outcome of the floor.  Third key- when the sealer says don't step on it for 3 days- they really mean it.  Before 3 days and it won't cure like it's suppose to you and you'll have to patch up spots which is not easy nor is it fun.

For the walls, Mom came down and helped me fabric the walls.


The top part of the walls is a basic cream sheet from Walmart and the bottom is fabulously textured orange fabric that I found on the remnants at Hancocks so it was priced just right.  To cover the seam between the two fabrics I used a black chair railing.

Here it is all finished:

I had enough orange fabric to cover the walls and make curtains.  The shelf above the beds has some greenery and small things but the main purpose is to cover the puck lights I have installed as reading lights over the boys beds.  They turn on by a touch connectors I placed on their bed posts.  The touch sensor has three dimmer settings which makes it nice if I need to come and give medicine to one of the boys at night, I can just slightly turn on the light and not have to turn on the ceiling light to see.

And since the walls are fabric-ed I hung three black bulletin boards by fishing line from the crown molding to give the boys a place to hang their special art work.

Here's a shot of how the light works when it's dark.


So before:

And after:


Happy decorating,