No, you have not tuned into HGTV even though all these decorating/remodel pictures and posts might lead you to believe so. However, I have had a few people ask me about how I stained the floors in the
boys' room,
hallway, and
guest room/office so I thought a FAQ/how to post would be a good place to send them.
Here's my disclaimer on this. It's been a year since I did the last floors and to me the project is like childbirth. If you had asked me moments after finishing the project if I would be willing to do it again you would get a very different response from today. My mind needs time to forget what happened in order to sign me up for it again. But, like childbirth, after all that work, I have something lovely at the end.
I wasn't blogging when I did the floors but I'll try to recap as much as I can and please feel free to ask any questions.
I didn't go with all out acid stain on the floors, though I've known some who have done it within an already established home. But for me, most of the videos and tutorials I could find were in open warehouses or not-yet-complete homes. And then I read somewhere about how the acid can damage walls if it gets on the drywall and how you have to get the base on the acid at just the right time or it can damage the floors. I have no idea if that's true or not, but it was enough to send me looking for other resources.

Back in the day my mom painted some concrete floors to look like rocks and they looked awesome. I have no idea the product she used but the product I went with was the tintable
Behr Semi-Translucent Concrete Stain. But before I could get there, I had to remove the old carpet.
If your carpet is like mine was, a starting point for pulling up the carpet was to just grab one of the wrinkled spots, stab it with scissors, cut a starting point and pull. It helps to have a friend carry the old carpet out because that stuff can get heavy. Remove the pad underneath it as well.

Once you have that removed, you'll need to take up the carpet tack strips that held the old carpet in place. I found that the easiest way to do this is to get a hammer and a flathead screwdriver (and a good pair of earplugs and workgloves- those tacks can HURT!). Wedge the flathead screwdriver under the tack strip near one of the nails holding the tack strip to the floor and hit the handle of the screwdriver to wedge it in further under the strip. This should create pressure and cause the nail to pop out of the floor. Sometimes this will only break the strip and leave the nail in place. If that happens just get some needlenose pliers and wiggle the nail out. Doing this will likely take off some of the concrete around the area where the nail was. There are products out there to patch the concrete but depending on the look you're going for, leaving small blemishes like that could be okay. I left the blemishes. (By the way, that's not a picture of my arm- I found it online- least you all start trying to get me in for a good beautification day. I may be into manual labor but I'm not into looking like a man)

Once that's all removed and you step back to see the space you'll be transforming, you very well may break down and cry (have kleenex on hand), questioning why on earth you thought this project was a good idea. Because if your home builder is like mine was back in 1985- he never thought for one moment that anyone would ever see under the carpet, which is why he felt he could leave drywall and paint and a general mess under the carpet. However, you have decided to pull up the carpet and create something fun and unique but you'll have to now clean up his mess first.
In the boys room I thought I needed to have every piece of this man's mess off the floor before I could proceed (this would he
very true if you were using acid stain). So I used paint stripper, steel wool, flat hand scrapers, and wire brushes and worked for hours on the floor. (HINT: When using stripper on the floor, do not sit in the stripper, it will eat through your pants and burn your tushie-- I'm just sayin'). But once I saw how well the technique I used covered the floor, I realized it's okay to have some paint down there- the main thing is to get the drywall junk off and make sure the floors are clean. So the next time I did this, I bought some medium steal wool and used Dawn detergent and water to clean the floors. This is way less toxic than the stripper but still gets the floors clean. Have plenty of cleaning rags on hand to wipe up the pieces of steel wool off the floor. I don't have pics so I'll try and describe the process:
- Dip steel wool in bucket of very warm (almost hot) soapy water
- Scrub wet steel wool on the floor in a circular motion trying to get all the loose dirt and drywall off the floor
- Use cleaning rag to wipe the floor towards you.
- Work in sections until the whole floor is clean.
A few tips on this- don't clean the steel wool out in the sink and don't dump the cleaning water in a nice white bathtub or you'll be cleaning rust off the bathtub and sink. And use disposable cleaning rags. Normally I'm all for reduce- reuse- recycle but if you put rags with steel wool in the washer- you'll be cleaning rust out of it too.

After you've cleaned the floors (I think I did it twice to make sure all the stuff was up that was going to get up) you need to prime the floors. I'm not going to say you
have to do this step, but it does say it promotes adhesion and really, you don't want to have to come back and touch up.

For this step, the base color and the sealer I used Sur-Line's 7" flat paint pad. This helps the process truck right along and was a great way to make sure I didn't end up with brush stroke or bristles stuck to the floor.
And even though I'm not the most patient person in the world, I have to agree that the drying/ recoating times they list on the cans are very important to follow. What you're going for is a good look that is
stuck to the floor and not a look that picks up and comes with you each time you take a step.
Once the primer had time to dry I used the flat paint pad to put down the base color, baked clay, which is one of the standard colors offered by Behr in the Semi-Transparent Concrete Stain.
And with all these csteps remember to paint your way out of the room, you don't want to have to walk across the wet paint you just put down.

Here's a pic from me when I was working on the boys room

Again, be sure to let the base color get good and dry.
Once the base color has dried the real fun starts. For the next step I used spray misters from Walgreens that have multiple sprayer settings (this helps every drop not look the same) and filled one with the base color, one with a darker color (I used Behr Chicory), and for the third one I used regular black acrylic paint (like the Plaid kind you can buy at Hobby Lobby) that I watered down until it was liquidy enough to spray through the spray mister. It's best to have a place you can test the nozzle settings and the black (which you don't want to have too watery) before you take it into the room to spray.
When you have the spray settings as you want them- take them into the room and spray away. It's really best to have
everything out of the room that matters to you and to wait and change the light fixtures, paint the ceiling, paint the walls, paint the woodwork (you get the idea) after you have finished the floors because in order to not have the same direction with each spray you want to ... well... go a little crazy with the spraying and if you're worried about ruining something in the room you won't have the same artistic freedom you would otherwise.
I let one coat dry and then came back and sprayed the room again. This helps give a multi-level dimension to the room. If you're not going for that look- than one coat might do it for you.
 Once the floors look how you like them it's time to seal them. As with the primer, I'm not going to tell you have
 to do this, but you've already put a lot of work into the floors by now and you don't want to see the work wear off quickly- so take the time and seal it. There are some high gloss sealers if you're looking for something shiny, but I didn't want gloss, so I used the low luster concrete sealer from Behr and applied it with the flat paint pad.
Since I work and have kids I had to work on this project as I could but I was able to do a 12 x 12 room within a week from pulling up the carpet to putting down the sealer. If you have some straight hours you can devote to it, it could certainly be done faster. And while I don't have the receipts to prove it, I do remember talking with LK about the first 12 x 12 room I did being the "100.00 experiment." So I'm going to guess that the whole thing cost between 100.00 to 150.00 depending on if you have some steel wool, disposable cleaning rags, and black paint on hand or not.
A few more hints:
- Without question DO NOT even step a toe on the finished concrete before 72 hours has passed. If you do this will cause the paint and the concrete not to bond and it will pick up under foot. It might not the first time, but trust me- it will. So wait.
- Do all connecting rooms at the same time if possible. If you don't or doing so is just impossible (i.e. would leave you climbing out a window when you're done painting), you can blend the new and old space together but it's really not as easy as doing it all at the same time.
- You can't, unfortunately, let the stain sit too long in the sprayer or it will clog the sprayer- but they're also only about 4.00 each so it's not too painful to buy another one if the first clogs (which can still happen sometimes no matter how well you clean the sprayer).
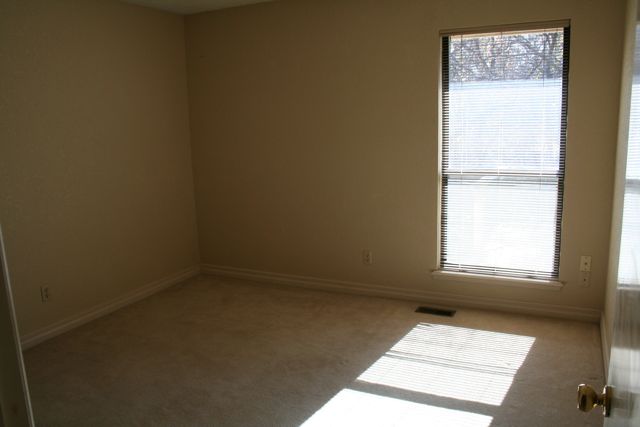
Here's my finished product. Do you have picture of your finished project? If so, post a link. I'd love to see it.
Happy decorating,